Setting up a UI Test build agent
Many UI automation frameworks automate not only using automation patterns, but also automate your mouse and keyboard. This means that you need a fully unlocked desktop for things to work correctly. This blog post will show you how to setup a UI Test agent on Azure VM’s, but you can use your own vm infrastructure.
I recommend using a VM, because otherwise you are leaving a desktop unlocked where anyone can come and use it. At least VM’s run on a locked desktop, or on the cloud and you need to remote in.
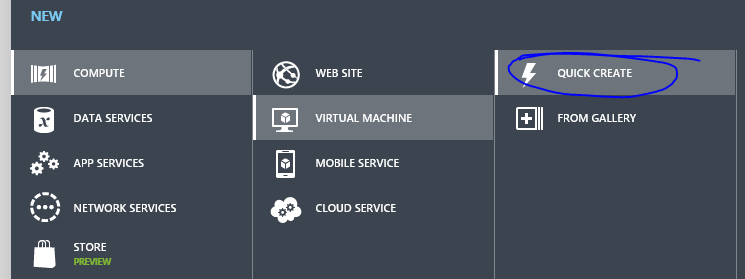
Create our VM on Azure
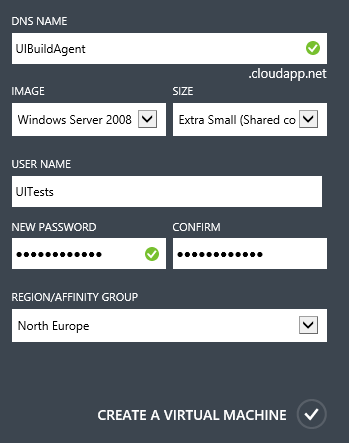
I choose Windows Server 2008 R2 as the Operating System, it is preferable to use a client operating system, but server OS’s are all that are available in Azure. This also means you don’t have to work around the fact that the 2012 start screen shows first, and we need to be on the desktop.
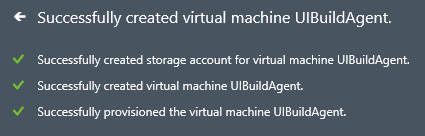
Now we are ready to go, lets remote desktop into our VM

Enter your remote desktop credentials which we you setup when creating your VM

Setting up your VM
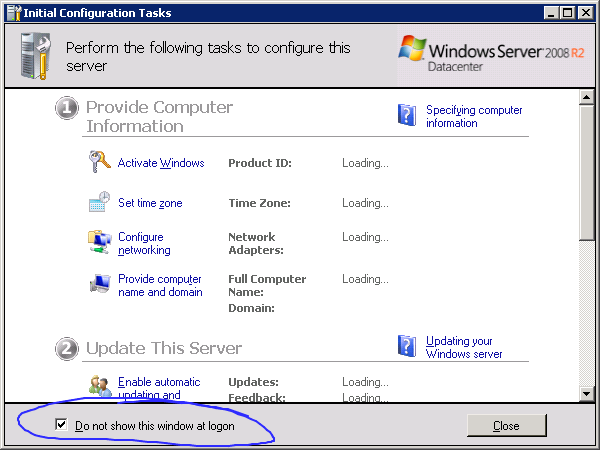
On first login, make sure you tell the initial configuration and server manager to not open on start
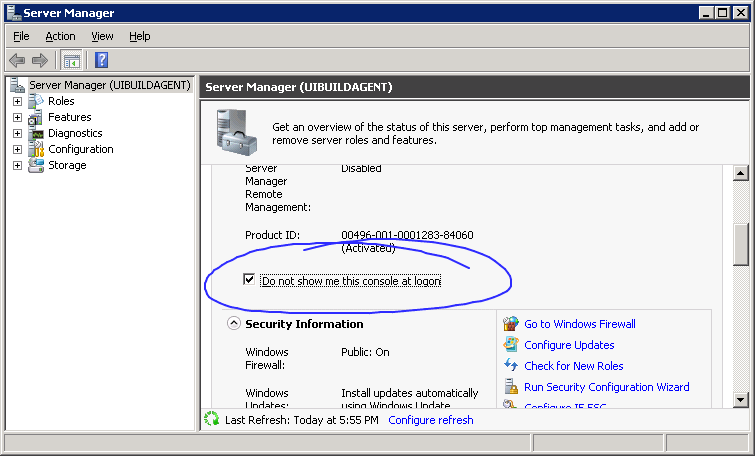
Before you close server manager you want to click on Configure IE ESC, then turn it off. Otherwise downloading everything will be rather painful (unless you just want to download firefox or chrome, then don’t worry.
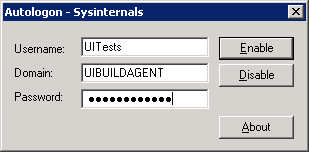
Next, we need our VM to login automatically, if our VM restarts, it needs to come straight back up and logs in.
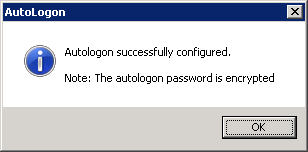
To do this, download Sysinternals Autologon for Windows from http://technet.microsoft.com/en-us/sysinternals/bb963905.aspx. Once you have downloaded, extracted, run and accepted the EULA you can enter the credentials to login with.
The advantage of using this tool rather than just putting it in the registry, is that your password will be encrypted rather than plain text :)
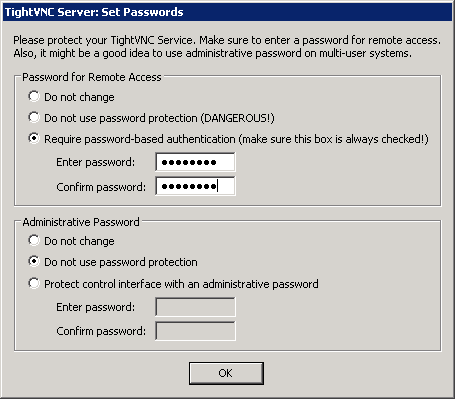
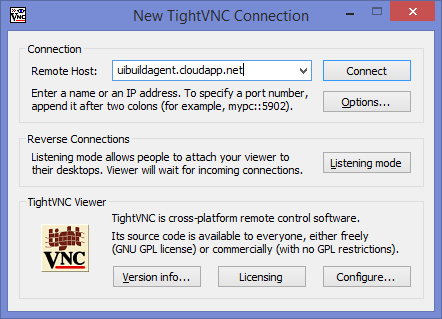
Next we need to install VNC onto the server, we cannot use remote desktop because after you disconnect the desktop will lock, and your tests will start failing. TeamViewer will also work.
Personally I use TightVNC.
Installing/Configuring TightVNC
- Download from http://www.tightvnc.com/download.php
- Do a complete install, leave all options ticked when presented with them.
- Set your passwords, I am happy to not have a separate administration password.
- Install the DFMirage driver, available from the TightVNC download page
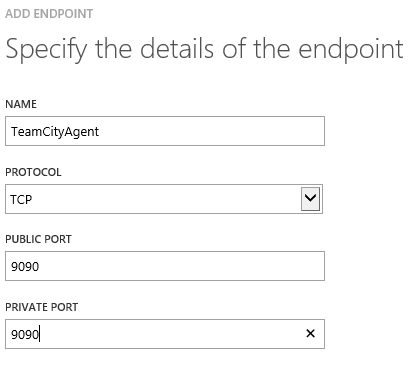
- If using azure you need to open up the port (Manage VM, EndPoints, Add, Next)

Finishing VM Setup
Reconnect using something other than remote desktop
Now you are logged in, bump the screen resolution up to 1280x1024 (or whatever suites you).
Disable WER
Windows error reporting causes issues when running UI automation, if you app crashes (which is why we have UI automation, to find that sort fo thing) then you want it to exit straight away, not popup the Windows Error Reporting Dialog
Save the following text into a .reg file i.e DisableWER.reg then run
Windows Registry Editor Version 5.00

[HKEY_LOCAL_MACHINE\System\CurrentControlSet\Control\Windows]
"ErrorMode"="2"

[HKEY_CURRENT_USER\Software\Microsoft\Windows\Windows Error Reporting]
"DontShowUI"="1"
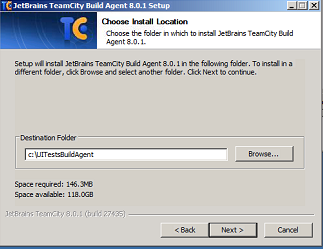
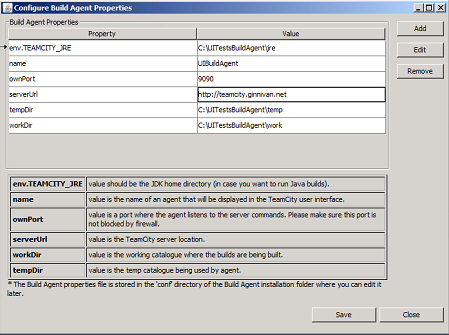
Installing the teamcity build agent

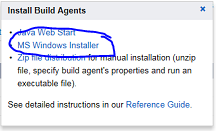
Fill in your teamcity server URL, and note the port number the agent is running on
Now we go back into Azure Management, and add the port
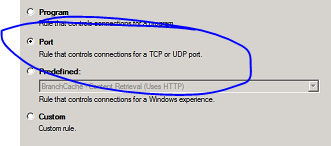
Open Filewall Ports
Once we have added the port on azure, we need to open the windows firewall for that port on the VM itself
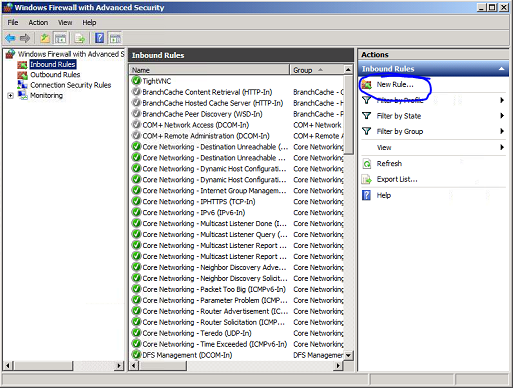
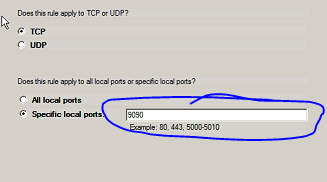
Put in port 9090, or whatever you set your teamcity server to
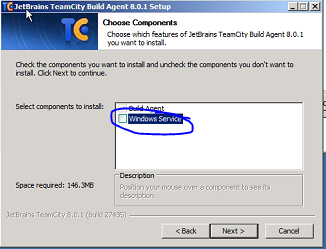
Next, Next, Next, give it a good name ‘TeamCity Build Agent’, Finish
Set to automatic startup
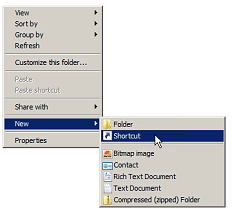
Now open explorer, and go to %userprofile%\AppData\Roaming\Microsoft\Windows\Start Menu\Programs\Startup and create a new shortcut
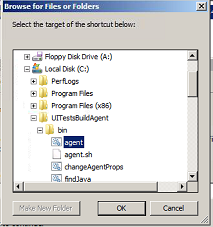
Browse to your TeamCity build agent folder, and select agent.bat
Then add the parameter start onto the path. You should end up with
"C:\UITestsBuildAgent\bin\agent.bat" start
Then give it a good name like ‘Start UI Test Agent’, click finish. Then Run the shortcut. Your TeamCity build agent should startup and connect to TeamCity
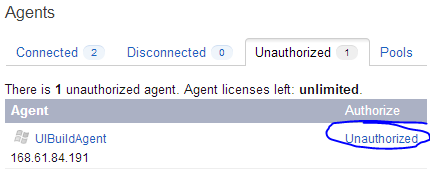
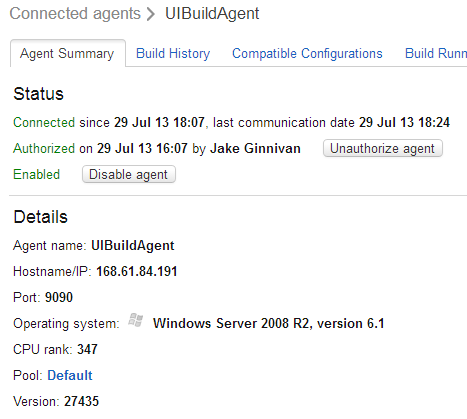
Authorise the build agent, then the agent should update itself and restart, after a few minutes you should have another build controller online!

Conclusion
There you have it, a build agent that runs UI Tests on an unlocked desktop in Azure